Introduction
If you're implementing Ashby, one of the first steps to optimize your recruiting operations is configuring your departments and locations. This foundational Ashby setup step unlocks better job organization, smoother hiring workflows, and accurate reporting. Whether you’re a growing startup or a distributed enterprise, setting this up properly ensures you get the most out of your applicant tracking system.
In this guide, we’ll walk you through exactly how to configure departments and locations inside Ashby, provide best practices from our Certified Ashby Experts, and show you how to use these configurations to manage user permissions and power custom reporting.
TL;DR
- A well-structured Ashby configuration improves job management, workflows, and analytics
- Set up departments and locations early to align your hiring structure with team needs
- Certified Ashby Experts can help implement scalable configuration strategies across growing teams
Need an Ashby Expert? Our team can assist with account configuration, feature implementation, and maximizing the Ashby ATS experience for your entire hiring team.
Why Department and Location Configuration Matters
Setting up departments and locations within Ashby provides several key benefits:
- Clear Organizational Structure – Ensures job postings are categorized under the appropriate department and location
- Efficient Recruiting Workflows – Helps recruiters and hiring managers easily navigate open roles by team and geography
- Enhanced Reporting and Analytics – Enables department- and location-specific hiring insights
- Permission and Access Control – Assigns access levels based on department and location, ensuring the right people see the right information
Step 1: Setting Up Departments in Ashby
Accessing the Department Configuration Section
- Log in to your Ashby account
- Navigate to Admin Settings from the dashboard
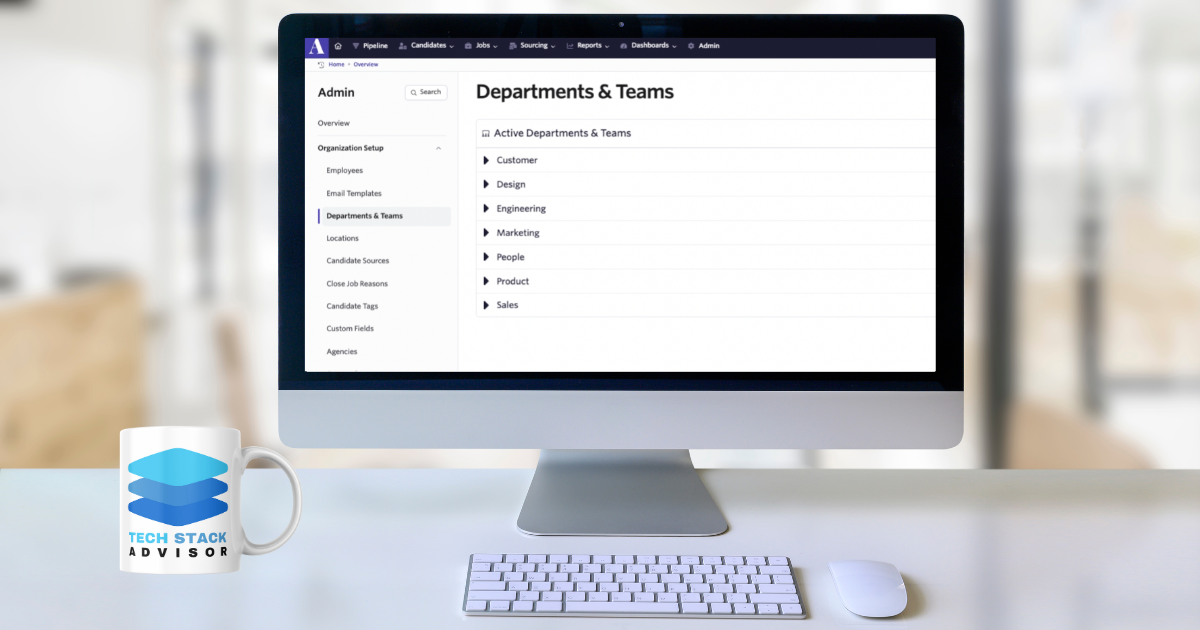
- Click on Departments & Locations
- In the Departments section, click Add Department
Creating a New Department
- Enter Department Name – Example: Engineering, Sales, Marketing
- Add a Description (Optional) – Define the department’s function
- Assign a Department Manager – Choose the responsible hiring lead
- Click Save to confirm
Editing or Removing a Department
- Edit: Select from the list, update the fields, click Save
- Delete: Ensure no jobs are linked, then click Remove
Department Best Practices:
✔ Use consistent naming across departments for cleaner filtering
✔ Assign at least one admin or manager to every department
✔ Review and update department structures quarterly as your team scales
Ashby Expert Tip: When creating departments, think ahead. You can streamline reporting and workflow visibility if you group roles logically – for example, instead of lumping all technical hires into "Engineering," consider sub-departments like "Frontend," "Backend," or "DevOps."
Step 2: Configuring Locations in Ashby
Adding a New Location
- Go to Admin Settings > Departments & Locations
- In the Locations section, click Add Location
- Enter Location Name – e.g., Remote, New York Office, San Francisco HQ
- Specify Location Type:
- Physical Office
- Remote
- Hybrid
- Click Save to finalize

Assigning Locations to Jobs
- When creating or editing a job, go to Jobs > Create Job
- Fill in the job details
- In the Location field, select from the dropdown
- Click Save to confirm
Locations Best Practices
✔ Use consistent location names to avoid duplicates
✔ Assign job-specific locations for better reporting
✔ Keep location records up to date with office moves and remote policy changes
Step 3: Managing User Access by Department and Location
Assigning Users to Departments
- Go to Admin Settings > Users & Permissions
- Select a user
- Under Department Assignment, select the appropriate team(s)
- Click Save
Configuring Department-Based Permissions
- Navigate to Permission Groups under Users & Permissions
- Create or edit a group
- Define access levels tied to department (e.g., view jobs, manage candidates)
- Assign users accordingly
- Click Save
Ashby Expert Tip: Role-based access can get complicated quickly. Before assigning users, create a matrix that outlines who needs visibility into what data. This will help avoid bottlenecks and unintentional data exposure. Need help?
Limiting Access Based on Location
- Under Permission Groups, create a new Location-Based Access Policy
- Assign recruiters or hiring managers to specific locations
- Limit visibility to jobs, candidates, and reports by region
- Click Save
Best Practices for Limiting Access:
✔ Ensure managers only see data tied to their teams
✔ Use location-based permissions to protect data integrity
✔ Perform quarterly audits of permissions to maintain security
Step 4: Leveraging Departments and Locations for Reporting
Ashby’s reporting engine becomes much more powerful when departments and locations are properly configured.
Generating Department-Specific Reports
- Navigate to Reports > Custom Reports
- Choose the Hiring Metrics report type
- Apply the Department Filter
- Click Generate Report
Creating Location-Based Reports
- Go to Reports and select your report type
- Use the Location Filter to sort data by office or region
- Customize additional filters as needed
- Click Generate Report
Location Reporting Best Practices:
✔ Monitor time-to-hire by department to improve speed
✔ Track performance by office to identify top-performing regions
✔ Use reports to justify resourcing decisions and support leadership visibility
Final Thoughts
Configuring departments and locations isn’t just about system setup – it’s foundational to how your team scales recruiting. By setting these fields up with intention, you enable accurate reporting, efficient workflows, and appropriate data access.
Looking for help with Ashby configuration or system optimization? TalentLink’s Certified Ashby Experts are here to support you through implementation, configuration, and ongoing strategy.


